
7 Summer Grilling Upgrades Worth Making Before July 4th
Summer is the peak season for outdoor cooking, and a few targeted upgrades before the busy stretch from July through Labor Day can make a significant difference in how your food turns out — and how much effort each cook requires. These aren't expensive overhauls. Most of them cost under $30 or take less than an hour to set up, but they address the issues that consistently trip up backyard cooks: uneven heat, food sticking to the grate, running out of gas mid-cook, and not having a reliable way to handle both searing and gentle finishing at the same time.
Set Up Two-Zone Cooking
If you are cooking everything over direct, full-blast heat, you are setting yourself up for burned outsides and undercooked insides — especially on thicker cuts like bone-in chicken, pork chops and burgers over an inch thick. The fix is two-zone cooking: one side of your grill running hot for searing, the other side with low or no heat for gentle finishing after the sear.
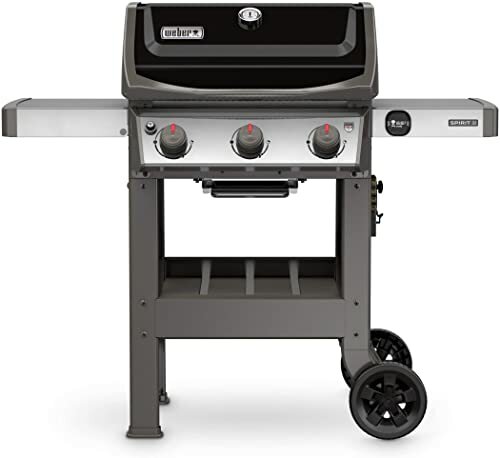
On a 3-burner gas grill, this is as simple as turning two burners to high and leaving the third off. On charcoal, bank your coals to one side. The result is a grill that can handle fast-searing a steak and then moving it off-heat to finish without drying out — all without opening a recipe or adjusting anything mid-cook.
If you don't already have a setup that makes this easy, our 3-burner gas grill guide covers which models give you the most useful zone separation for everyday backyard cooking.
Upgrade Your Grate Material
The grate is the single most contact-heavy component on your grill, and the material makes a real difference. Thin chrome-plated grates rust quickly and lose heat fast. Cast iron grates retain heat much better and create superior sear marks, but require regular seasoning. Stainless steel grates sit in the middle — rust-resistant and easy to maintain, though they don't retain heat quite as well as cast iron.
For most backyard cooks, replacing worn chrome grates with stainless steel is the upgrade with the best payoff for the effort. Cast iron is worth the investment if you grill frequently and are willing to season the grates a few times a season. Both options typically cost between $20 and $60 depending on your grill's cooking area.
Quick tip: When seasoning cast iron grates, coat them lightly with flaxseed or vegetable oil and heat the grill to around 400°F for 30–40 minutes with the lid closed. Let them cool before cooking. Repeat 2–3 times to build a solid non-stick layer.
Get a Reliable Instant-Read Thermometer
Guessing whether meat is done by pressing it, cutting it open, or timing it on the clock is one of the most consistent ways to overcook things. A good instant-read thermometer takes the guesswork out entirely — and more importantly, it lets you pull meat at the exact right temperature rather than defaulting to the "when in doubt, leave it longer" approach that dries everything out.
For summer grilling, an instant-read with a two-to-three second response time is sufficient for most tasks. If you are doing longer cooks — smoking a whole chicken, or finishing thick ribs — a dual-probe leave-in thermometer that tracks both internal meat temperature and grill temperature simultaneously is worth the extra cost.
Sort Out Your Fuel Situation Before the Weekend
Running out of propane halfway through a cookout is a rite of passage that everyone has experienced once. Avoid it for the rest of the summer by keeping a spare tank on hand if you use a gas grill, or pre-measuring and bagging enough charcoal for your typical cook before guests arrive. A full 20 lb propane tank runs most 3-burner grills for 20–25 hours of use — plenty for a season of casual cooking, but it goes faster than expected when you're running high heat for extended periods.
If you use a pellet grill, keep a full spare bag of pellets in a sealed container. Pellets absorb moisture quickly in humid summer weather and crumble in the auger, which causes temperature inconsistencies mid-cook.
Add Wood Smoke to Your Gas or Charcoal Grill
Smoke flavor is one of the biggest differences between backyard-grilled food and the kind of deeply flavored barbecue that takes hours in a dedicated smoker. You don't need a full smoker setup to get there, though. On a gas grill, a small stainless steel smoker box filled with wood chips and placed directly over a lit burner produces real smoke within a few minutes. On charcoal, adding two or three chunks of hardwood on top of your coals is all it takes.
For summer proteins, apple or cherry wood suits chicken and pork well. Hickory produces a stronger, more assertive smoke that works well with beef burgers and thicker cuts. If you want to go further and cold-smoke foods like cheese or butter that can't handle direct heat at all, see our guide on cold smoking for beginners and our review of the best cold smoke generators.
Do a Proper Mid-Season Deep Clean
Most grill cleaning instructions focus on the grates, but the interior build-up on the lid, walls and grease tray is what actually causes the most problems mid-season: flare-ups from accumulated grease, temperature instability from carbonized debris affecting airflow, and — if things get bad enough — grease fires. A mid-summer deep clean takes about an hour and pays dividends through September.
- Brush the grates while the grill is still warm after a cook — not cold.
- Empty and clean the grease tray every three to four cooks during heavy summer use.
- Use a putty scraper on the interior lid and walls to remove the carbonized layer.
- Check that any gas burner ports are clear — clogged ports cause uneven heating.
- Inspect the igniter contacts and clean off any corrosion with fine sandpaper.
Note: If your grill is more than five years old, it's worth checking replacement parts availability. Burner tubes, flavorizer bars and grates are commonly available as direct replacements from manufacturers like Weber — often for less than $40 — and refreshing these components can restore a grill that's been running inconsistently.
Try Cold Smoking Something This Summer
If you've never cold-smoked anything, summer is a good time to start — specifically, begin with cheese. Hard and semi-hard cheeses like cheddar, gouda and gruyère take smoke well, don't require precise temperature control, and the process takes one to two hours. The results are noticeably better than anything from a grocery store, and it's a low-stakes way to learn the mechanics before moving on to smoked butter, bacon or fish.
A cold smoke generator placed inside your existing grill or smoker is the simplest setup. You don't need a dedicated smoker — just a way to contain the smoke around the food at ambient temperature. Our complete cold smoking guide for beginners walks through setup, timing and which foods work best.
The Bottom Line
None of these upgrades requires a new grill or a major investment. Two-zone setup is free. A grate upgrade costs $30–60. A thermometer runs $20–40. Together, these changes address the most consistent points of friction in backyard outdoor cooking and give you a setup that's more reliable, more versatile and more enjoyable to cook on through the rest of the summer season.
If you're thinking about a full equipment upgrade this summer, our current top picks are in the best 3-burner gas grill guide and the best pellet grills under $500. And if you want to extend what your grill can do, start with the cold smoke generator review for a low-cost accessory that adds a genuinely different dimension to outdoor cooking.