
Cold Smoking for Beginners: How to Add Smoke Flavor Without Heat
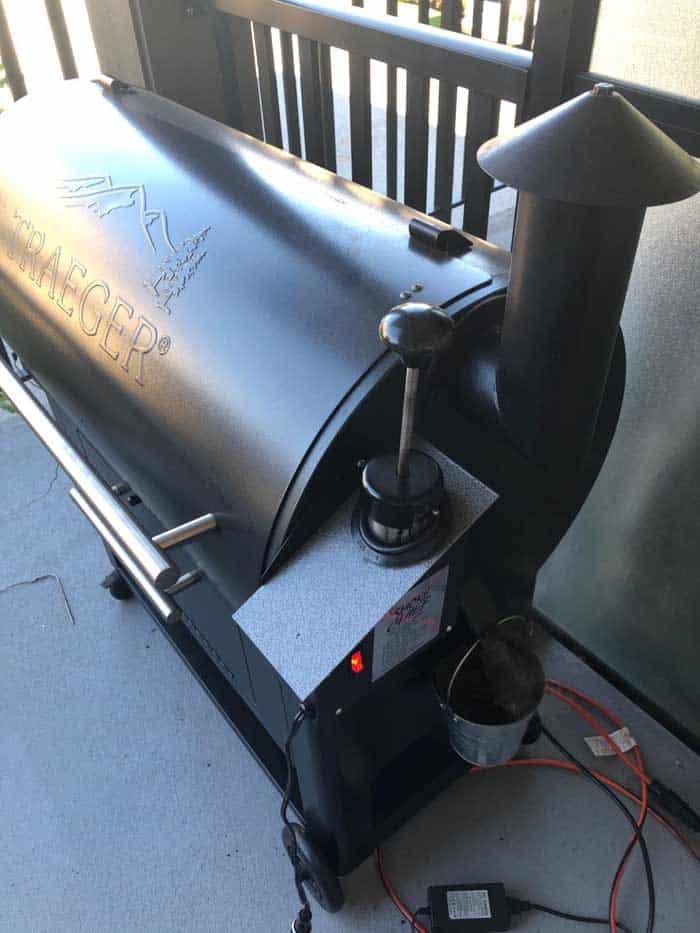
Cold smoking is what happens when you apply wood smoke to food at temperatures below 90°F — well below the point where heat would cook, melt or dry out the food. The result is a layer of smoke flavor that penetrates the surface and transforms ordinary ingredients: cheddar cheese becomes complex and slightly sharp, butter turns into something you want to spread on everything, bacon cures with genuine depth rather than liquid smoke flavor. None of this requires a dedicated smoker setup. If you already own a grill — gas, charcoal or pellet — a cold smoke generator is the single accessory that unlocks all of it.
What Is Cold Smoking?
Hot smoking — the kind most people picture when they think of a smoker — cooks food with indirect heat and smoke simultaneously. A cold smoker does something different: it generates smoke and delivers it to the food at ambient or near-ambient temperature, without raising the internal temperature of the food high enough to cook it. The target range for cold smoking is typically 60–90°F (15–32°C). Above 90°F, soft fats start to melt and the texture of the food changes; above 120°F, you're moving into warm-smoking territory.
The practical effect is that you can smoke foods that would be ruined by heat. Cheese melts and loses structure at around 90°F. Butter is obviously useless above that point. Raw fish being prepared for cold-smoked salmon is cured, not cooked, and needs to stay cold throughout. Cold smoking lets you add smoke flavor to all of these while keeping them structurally intact.
For the tools that make this possible, see our guide to the best cold smoke generators, which covers the specific units we've tested and the setups they work best with.
What You Need to Get Started
The minimum setup for cold smoking at home is:
- A cold smoke generator — a small device that burns sawdust or wood chips slowly and produces a thin, cool stream of smoke. It sits inside your grill or smoker chamber alongside the food. See our cold smoke generator review for specific picks.
- An enclosed cooking chamber — your existing gas grill, charcoal kettle, offset smoker or even a cardboard box will work, as long as it holds the smoke around the food without being airtight.
- A thermometer — to monitor the chamber temperature and make sure it stays below 90°F, especially on warm days.
- The food — cheese is the ideal starting point. Hard cheeses like cheddar, gruyère and smoked gouda are forgiving and show clear results.
- Patience — most cold smoking sessions run 1–4 hours depending on how much smoke penetration you want.
You do not need a dedicated cold smoker. Any grill with a lid that creates a chamber works. The cold smoke generator does the work; the grill is just the enclosure.
How a Cold Smoke Generator Works
Most cold smoke generators use one of two mechanisms: a maze or spiral tray that holds fine sawdust and burns it slowly end-to-end (like an incense stick), or a tube that holds wood pellets or chips and is lit from one end. Both types smolder rather than flame — producing a thin, steady stream of cool smoke for anywhere from one to twelve hours depending on the design and how much fuel you load.
The generator sits in the bottom of the grill chamber or offset on one side, away from the food. It's not connected to any heat source — it's self-contained and creates its own combustion once lit. Because it generates almost no heat itself, the chamber stays at ambient temperature as long as the grill's burners are off. On hot days above 75°F, you may want to place a pan of ice in the chamber to keep the temperature down.
Our cold smoke generator review covers how different models compare on burn time, smoke output and ease of reloading.
Step-by-Step: Your First Cold Smoke Session
Choose a Cool Day and Time
For your first session with cheese, aim for an ambient temperature below 70°F (21°C) — early morning on a mild day works well. On warmer days, set up the grill in a shaded spot or place a small tray of ice inside the chamber next to the food.
Prepare the Food
Take the cheese out of the refrigerator 30–60 minutes before smoking. A slight surface drying helps smoke adhere more evenly. Cut blocks into pieces no thicker than 2–3 inches so smoke can penetrate through. Pat dry with a paper towel to remove surface moisture.
Load and Light the Generator
Fill the generator tray or tube with fine hardwood sawdust or pellets. Light one end with a tea light candle or a small torch — never use lighter fluid or a gas burner. Once the end is glowing and producing a thread of smoke, blow out any open flame and let it smolder.
Lighting tip: If the generator won't stay lit, the sawdust may be slightly damp. Spread it on a baking sheet in a warm oven at the lowest setting for 10 minutes to dry it before loading.
Set Up the Chamber
Place the lit generator on one side of the grill grate or on the charcoal grate below. Position the food on the opposite side or on a raised rack above — not directly over the generator. Close the lid and open all vents slightly to allow airflow without letting the smoke escape too fast.
Monitor Temperature and Smoke
Check the thermometer at 20-minute intervals for the first hour. The chamber should hold between 65–85°F on a mild day. Open the lid briefly if the temperature rises above 90°F. Check that the generator is still producing smoke — a maze tray will glow at the lit end and produce a faint thread of smoke even if not visibly heavy.
Finish, Rest and Refrigerate
After 1–2 hours for cheese (or your target time for other foods), remove the food, wrap it loosely in parchment paper and refrigerate for at least 24 hours before eating. This resting period is important — freshly cold-smoked cheese can taste sharp and acrid. After 24–48 hours in the refrigerator, the flavor mellows and integrates into something much more pleasant.
What to Cold Smoke: Best Foods for Beginners
Hard and Semi-Hard Cheese
Cheddar, gouda, gruyère, mozzarella. The most beginner-friendly option — forgiving, visible results, no food safety complexity.
Butter
Form into a log shape, chill until firm, then smoke. Excellent for corn, bread and finishing steaks. Use within one week.
Salt
Spread coarse sea salt on a tray and cold smoke for 3–4 hours. Smoked salt has dozens of uses in cooking and makes an excellent condiment.
Raw Bacon (pre-cured)
After curing pork belly with a dry rub for 5–7 days, cold smoke for 4–8 hours before slicing and cooking. Requires more preparation but produces outstanding results.
Cold-Smoked Salmon
Cured salmon fillet smoked at cold temperatures — the classic cold-smoke application. Requires careful food safety attention and an ambient temperature below 80°F throughout.
Garlic and Vegetables
Whole heads of garlic, peppers and tomatoes take cold smoke well and add depth to sauces, dressings and dips without any cooking.
Choosing the Right Wood
For cold smoking, stick to fine hardwood sawdust or pellets — not chips or chunks, which are designed for hot smoking. The particle size matters: fine sawdust smolders slowly and consistently, while larger particles burn too fast or go out.
- Apple and cherry — mild and slightly sweet, ideal for cheese, butter and poultry-based cold smoking. The go-to choice for first sessions.
- Hickory — stronger and more assertive, good for bacon and beef. Use in smaller quantities if you find it overpowering.
- Oak — medium intensity, versatile for most foods. A good all-purpose option if you can only buy one type.
- Alder — mild and slightly earthy, the traditional wood for cold-smoked salmon. Widely available in fine sawdust form.
- Beech — common in European cold smoking, mild and clean. Well-suited to cheese and delicate proteins.
Avoid softwoods like pine, cedar or spruce — they contain resins that produce bitter, acrid smoke and are unsuitable for food.
Common Beginner Mistakes
Too much smoke, too fast. A common error is packing the generator tightly and over-smoking the food on the first session. Cold smoking is cumulative — food absorbs smoke continuously throughout the session, and the flavor intensifies further during the resting period. Start with 1 hour for cheese and taste it after the rest. You can always smoke longer next time.
Skipping the rest period. Freshly smoked food, especially cheese, often tastes harsh and over-smoked directly out of the grill. The 24–48 hour rest in the refrigerator is not optional — it's part of the process. The smoke compounds need time to equilibrate into the food.
Smoking on a hot day without temperature control. If the ambient temperature is above 80°F and you don't add ice to the chamber, cheese will sweat and begin to lose structure before the session is done. Either smoke early in the morning or add a pan of ice cubes inside the chamber.
Using damp sawdust. Sawdust that has absorbed moisture from storage won't smolder properly — it either goes out or produces thick, acrid smoke. Store your sawdust in a sealed container and dry it briefly in a warm oven if it feels heavy or packs together when squeezed.
Food Safety in Cold Smoking
Important: Cold smoking does not cook food and does not make raw proteins safe to eat without further cooking or curing. Cheese, vegetables and pre-cooked foods are safe to eat after cold smoking. Raw meat and fish require curing first (salt and/or nitrite cure) before cold smoking, and some — such as cold-smoked salmon intended for direct consumption — require specific salt concentrations and controlled conditions. When in doubt, follow established food safety guidelines and consult authoritative resources specific to the protein you're smoking.
For beginners, starting with cheese, butter, salt and pre-cured foods removes the food safety complexity entirely and lets you focus on learning the mechanics. Raw protein cold smoking is a separate skill with more specific requirements.
Next Steps and Further Reading
Once you've completed a few sessions with cheese and butter, the next logical step is moving to cold-smoked salt (which has a very long shelf life and lets you use the result in cooking immediately) and then toward cured and cold-smoked bacon if you want to take on more involved projects.
For equipment, see our roundup of the best cold smoke generators — we cover the specific units that work best for beginners and which ones are suited to longer, more intensive cold smoking sessions. If you're also thinking about expanding to hot smoking or general outdoor cooking, our comparison of pellet grills vs gas grills covers the full landscape, and our summer grilling upgrades guide has practical tips that apply to any backyard setup.